The VuePilot scheduler allows you to control when particular content and pages within your rotations are to be displayed.
The scheduler allows you to perform specific time scheduling operations, such as
- Displaying content only after or before a particular date
- Displaying content only after or before particular times of the day
- Displaying content only on particular week days
- Applying multiple specific schedules to a single page
Please Note: VuePilot version 2.1.18 or above is required to use the scheduling features
How Does It Work?
A schedule is essentially a set of rules, when we specify a day, time or date it creates a check that basically says “should I show this page“, if the answer to any of these is yes, then the page will be shown. We assign these schedules to individual “pages” in the rotation. (A page is the terminology we use for any URL, App or piece of content in the rotation, ie each row listed is a page)
This allows us to create multiple schedules and layer them on top of each other so each schedule can override one another.
Here’s an example
Let’s say you have a promotional image that you wish to display from 5pm to 9pm every week day, and 9am until 5pm every saturday and sunday.
To do this we would create two schedules, one named maybe “5-9 Weekdays” and another named something like “9-5 Weekends” with the relevant configuration.
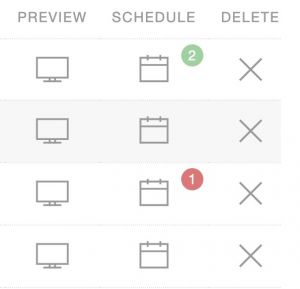
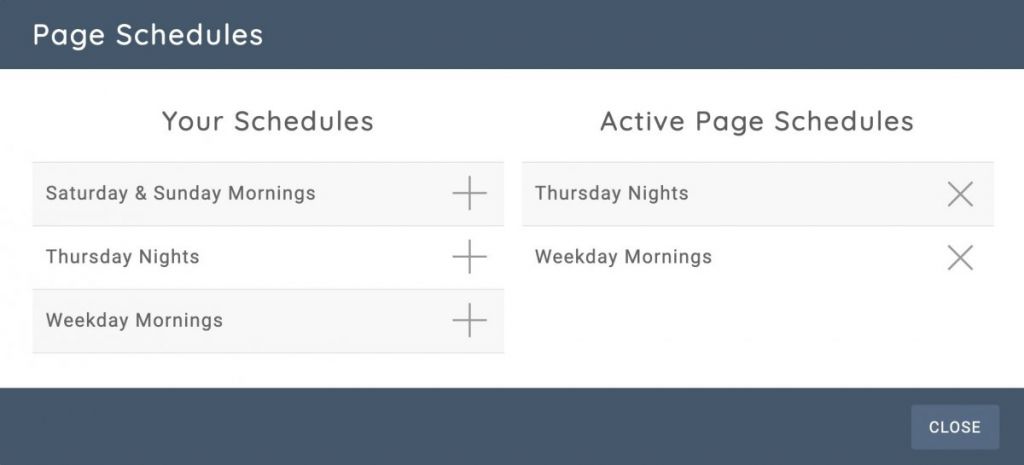
We then apply both of these schedules to the applicable pages within the rotations we wish to affect by simply clicking the “Schedule” icon on the page row, and selecting the relevant schedules. A small number bubble will appear next to the icon in the interface that indicates how many schedules are applied to this page.
In Schedule & Out Of Schedule Indicators
When viewing the rotations page from the VuePilot software, the schedule count indicators next to the schedule icon will be colored either green or red, indicating that the page is either “In Schedule” or “Out Of Schedule” which simply means weather or not that particular page will be displayed right now.
The colored indicators are not shown from within the dashboard as it is not known which timezone and time offset the machines displaying these rotations are currently in, instead they will appear as grey.
Creating Schedules
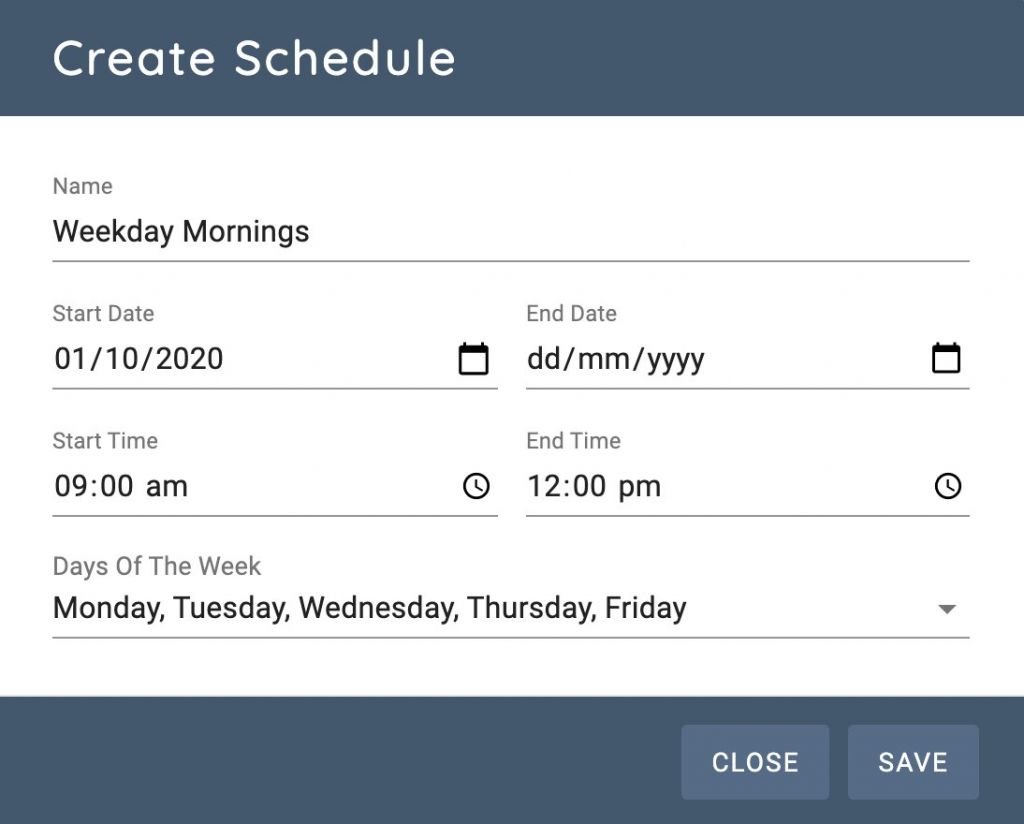
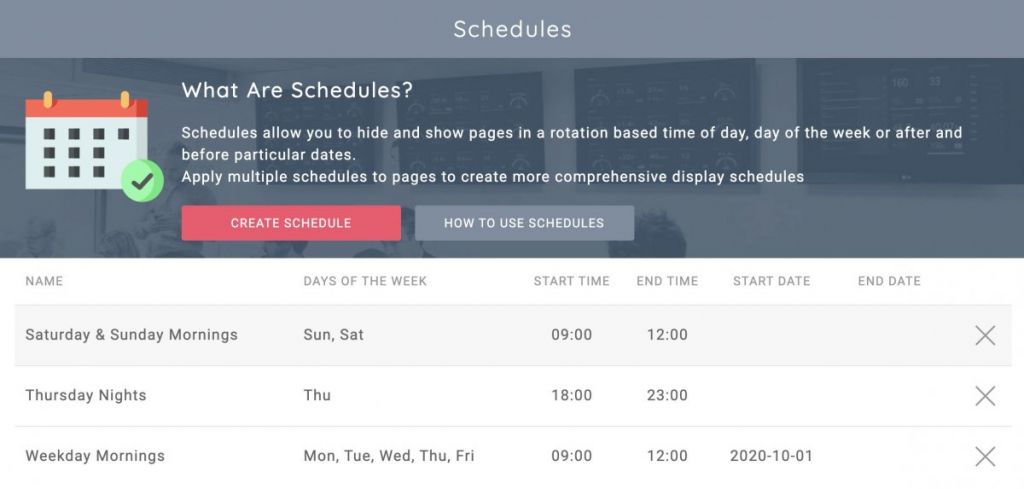
Creating schedules is done from the “Schedules” section of the dashboard. Each schedule can use as little or as many options as needed from the schedule.
For example, you may wish to create a schedule that ensures a particular screen is shown on mondays, in which case you would only fill in the “Days Of The Week” box by selecting Monday from the dropdown list.

You may create as many schedules for specific time periods as you need. You can then apply multiple schedules to an individual page in a rotation to create layered highly specific schedules.
Schedule Options
You may combine and use any of the following options within schedules. You may simply leave any option blank if you wish for it to not be taken into account when evaluating the schedule.
Start Date
Use the Start Date option to ensure content does not appear on any screen until after 12am on this specific date. Please be aware that the the content will be “in schedule” as soon as the current days date matches or is after this date.
Example, setting a Start Date of 01/10/2020 will mean the content will display at 12am on 01/10/2020
End Date
Use the End Date option to stop content being displayed after a specific date.
Example, setting an End Date of 01/10/2020 will mean the content will stop displaying at 12am on 02/10/2020
Start Time
Use the Start Time option to control when content should appear on screen on a daily basis.
Example, setting a Start Time of 09:00 am will mean that this content will not display, on any day that it is in schedule until after 9am.
End Time
Use the End Time option to control when content should stop appearing on screen on a daily basis.
Example. setting a End Time of 05:00 pm will mean that this content will not display, on any day that it is in schedule after 5pm.
Days Of The Week
Use the Days Of The Week option to control which days the content should be displayed on screen. When using this option, only selected days will take into account any other time or date schedule settings.
Please note that you may leave this option blank to specify all days of the week.
Using Multiple Schedules
In some cases a single schedule may not be enough to specify the level of scheduling control you want. In this case you may create and apply multiple schedules to individual pages in your rotations for complete control.
Take for example if you have schedule that specifies Weekday Mornings, yet you have another that specifies Thursday Nights. You can easily apply these both to the same page so that this page will appear during both of those scheduling windows.
Schedule Overlaps
You should be aware overlapping schedules when using multiple schedules per page. Each option in a schedule (Start Time, End Time etc) is processed as an individual rule when a rotation restarts. Multiple schedules are combined into a single long rule set and evaluated at the same time. When this rule set is evaluated, if it receives a “should show” answer from any of these rules, then the content will display regardless of the remaining rules.
Please note that when using multiple schedules you will need to ensure you do not overlap schedules at times when you do not wish for the content to be displayed.
For example, if you have one schedule that specifies a Start Time of 9am, yet you have another schedule applied to the same page that specifies a Start Time of 6am. Then the page will display at 6am as this will pass the “should show” “should not show” rules.
Regarding Time Zones and Offset
When creating schedules, you should keep in mind that times and dates will correspond to the timezone and UTC offsets of the machines that it runs on. To put it simply, when creating schedules, create them with the timezone of the target machine in mind.
For example, if you are based in San Francisco, California, but the schedule you are creating is for screens being displayed in New York, you should created the schedule for the relevant New York Time, ie your 9am will not be 9am in New York.
With this in mind, creating a schedule for say, 9am to 5pm, when applied to different rotations that run on different machines all over the world, they will all display at the correct 9am to 5pm for that local timezone.


